
Achilles Tendon Tear: What Is It?
Achilles Tendon Tear or rupture of the achilles tendon typically occurs while playing sports or from a misstep or from a heavy load pushoff. A strong contraction of the muscle excessively loads the tendon and it results in a tear. The patient often describes the sensation that something struck the back of the leg. The patient typically feels a pop, pain is suddenly present, and walking is painful and the leg is weak. Over the next several days, the pain typically decreases a lot, but the weakness is severe and persistent unless treated. Achilles tendon injuries may be missed because of the lack of pain after the first few days. Treatment of achilles injuries in a delayed fashion (after several weeks) is more complicated than treating an acute tear, and typically may be only treated with surgery.
Office Appointments and Telemedicine with Dr. Carreira
You can also book an office appointment or a telemedicine visit by calling Dr. Carreira’s office at 404-355-0743. Book now.
While it is possible to treat this ruptured tendon without surgery, this may not be ideal. Surgical correction of the ruptured tendon may be recommendable and the advantages and disadvantages of surgical treatment will be reviewed in detail.
The surgery is performed in order to regain as much as possible the normal strength and to prevent chronic pain. Regaining optimum strength depends on establishing the correct tension between the muscle and the tendon.
Following the tendon repair, no walking is permitted for the first few days, then walking is begun in a removable boot with wedges placed inside the boot. The design of this boot is important, and the positioning of the foot will be controlled with wedges during the first several weeks after surgery.
Repairing an Achilles Tendon Tear: PARS Achilles Jig System
In the last 15 years, there have been significant, new developments in the operative treatment of complete Achilles tears (also known as ruptures). There are now minimally invasive options that use significantly smaller incisions. Combined with a jig that allows for percutaneous passage of the suture material, the risk of wound problems, including infection, is reduced. Given that the main risk of surgical treatment of achilles ruptures is the healing of the incision itself, this minimally invasive technique decreases that risk.

The PARS Jig (Arthrex), which Dr. Dominic Carreira uses in his practice, also is designed specifically to avoid nerve injuries, especially to the sural nerve. The time for recovery is essentially the same as with an open surgery with a traditional incision.
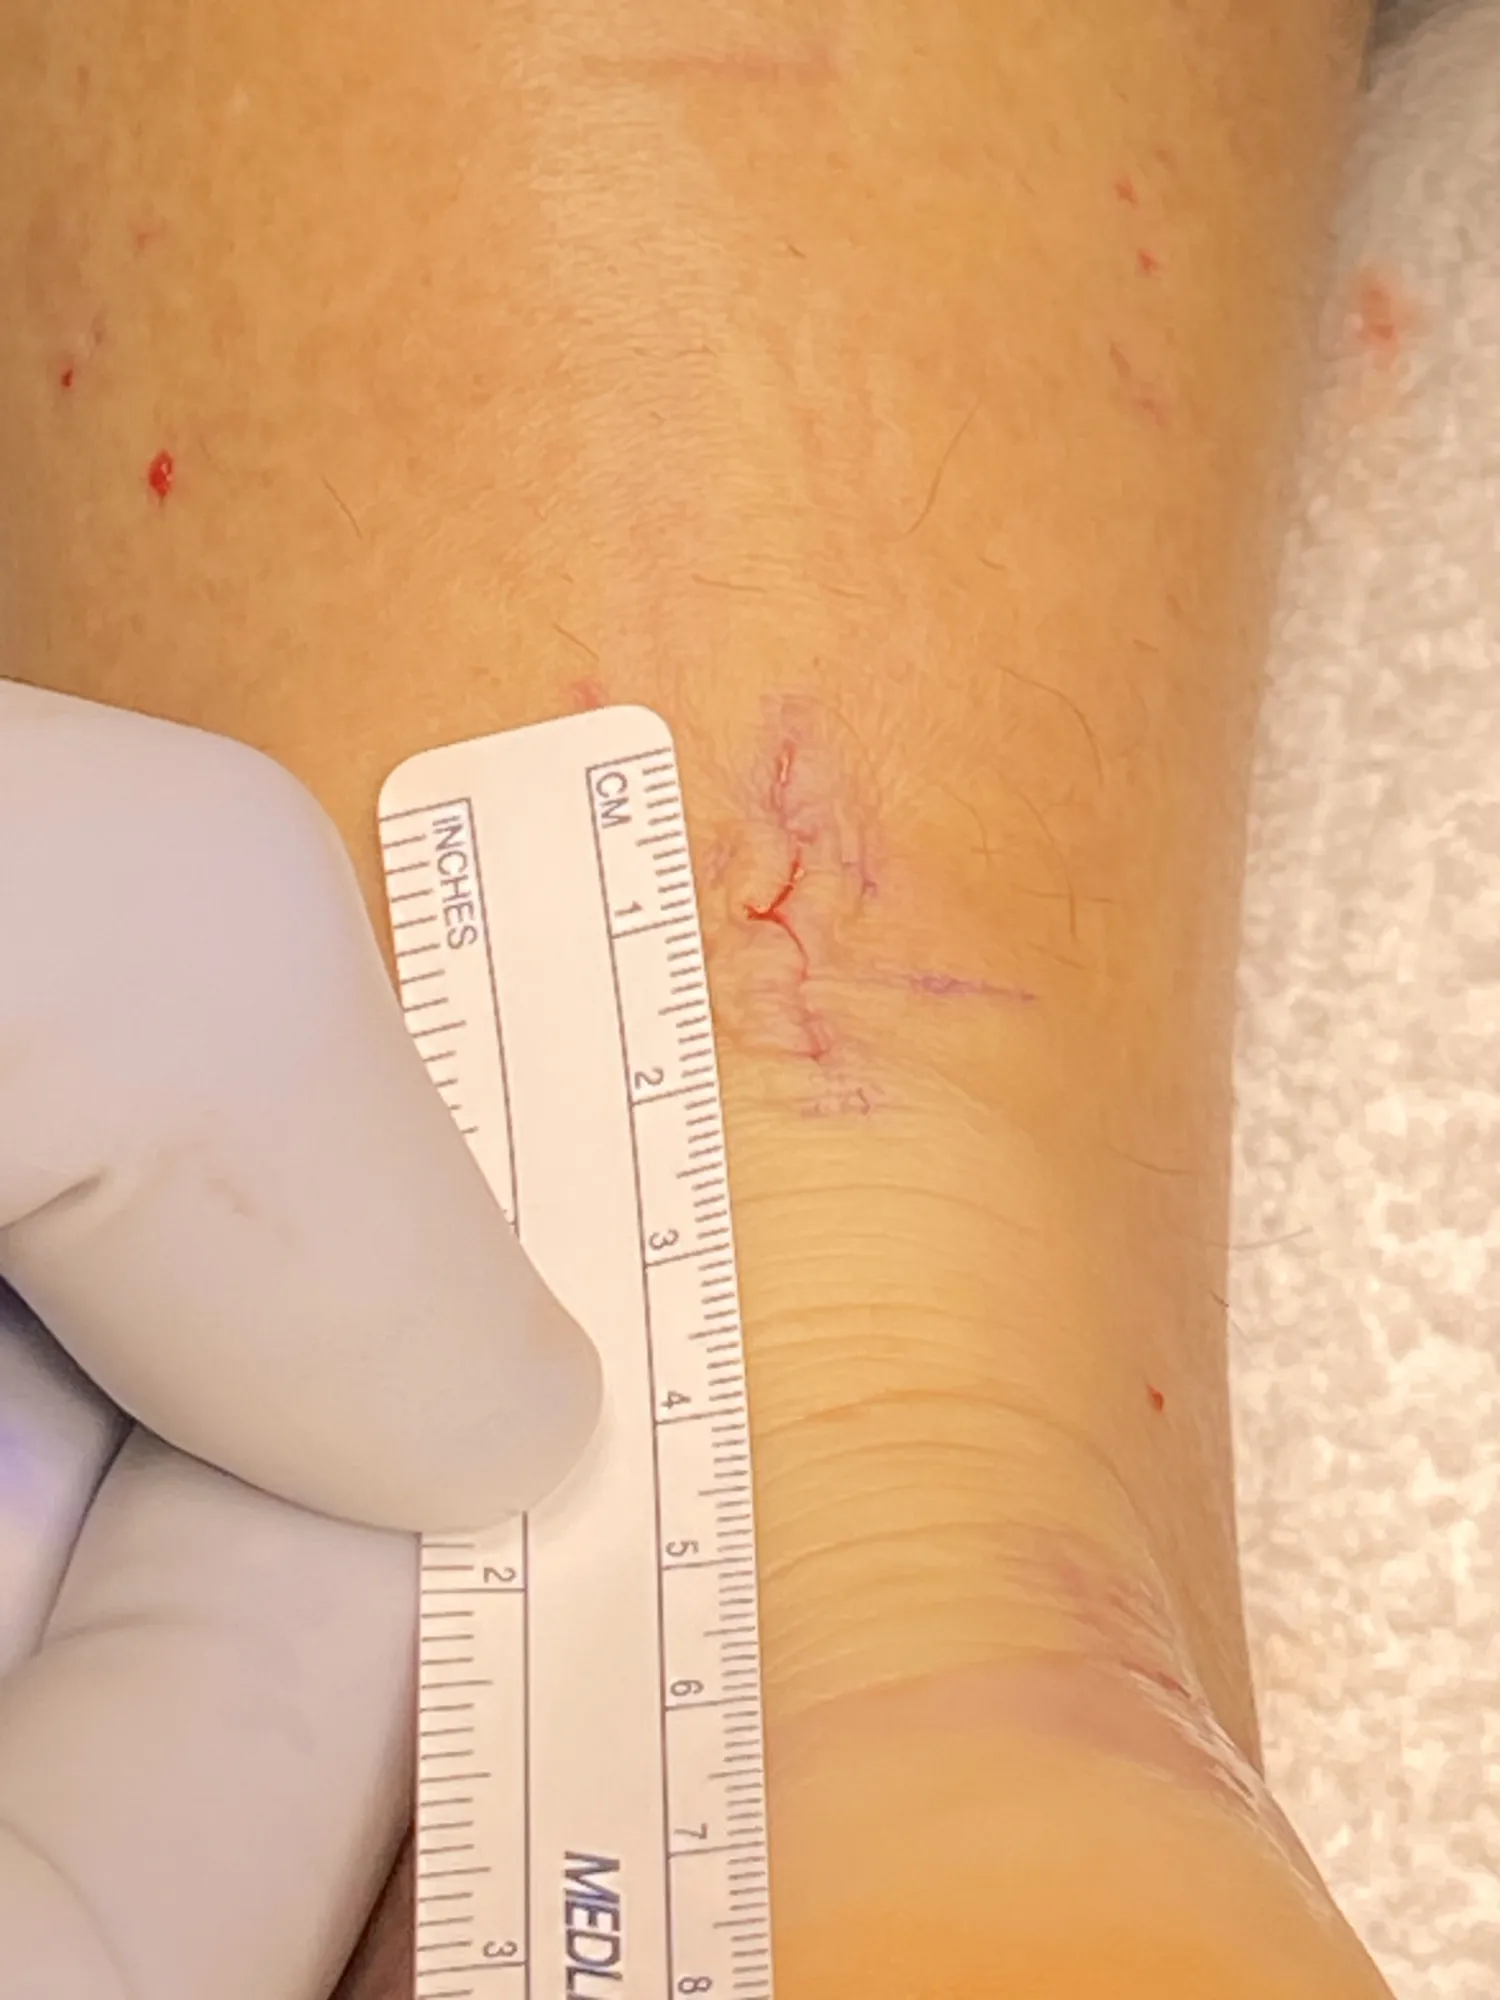
In this picture, the incision for the mini open PARS Jig surgery for the Achilles is shown. It is less than 2 cm which is less than 1 inch length. Smaller incision surgeries for the Achilles have been a trend to minimize complications, including wound problems and infections. This method is performed in practice 99% of the time for midsubstance tears of the Achilles (Achilles tendon tear).
In order to perform a successful surgery, the suture material passed percutaneously through the skin must have significant purchase of this tendon itself. For this reason, Dr. Carreira also consents his patients for an open technique, for the rare circumstance that a formal incision needs to be made in order to appropriately grasp tendon material. Dr Carreira has not needed to convert to an open incision in over 3 years while performing the minimally invasive technique.
Recovery from Achilles Surgery (Achilles Tendon Tear)
General Recovery Facts
The goal of surgery is to regain strength and function in as short a time as possible. You will need to use crutches for approximately two weeks after surgery. Once the sutures are removed, walking in a removable boot will be started. Walking and exercise are very important to regain strength after surgery and a careful physical therapy program and rehabilitation protocol is outlined below:
Postoperative Recovery
Day 1
- Foot wrapped in bulky bandage and surgical splint.
- Ice, elevate, take pain medication.
- Use crutches for a approximately 2 – 3 weeks.
Days 3-5
- First visit after surgery.
- Splint is removed and an Achilles boot with wedges in provided.
- Protocol for wedge removal from the CAM boot is provided.
- Partial weightbearing is allowed at no more than 50% body weight.
- Regular elevation is important in preventing excessive swelling and wound complications.
Day 14
- Dressing changed, and plantarflexion (downward movement of foot) is allowed.
- Write out alphabet with foot twice a day.
- Start full weight bearing in boot and follow the protocol related to wedge removal.
- Weightbearing is strictly IN THE BOOT.
Weeks 2-6
- Gentle exercise on bicycle with boot in place..
- By 6 weeks the boot comes to a neutral position, with gradual progression to this position completed by the removal of inserts from the boot.
6 Weeks
- Start physical therapy under supervision.
- Gradually wean from boot.
- Walking is the most important form of therapy at this point.
3 Months
- Strength specific exercises may be performed such as a single heel raise.